

AMP is a new technology that’s gaining the attention of online marketers in every field. It formats content in a way that loads blazingly fast for mobile visitors, whose page load time expectations can be as little as three seconds.
In this post, we’ll discuss what AMP is, as well as how to wire up your WordPress themes to support AMP templates. You’ll find a large amount of information and code samples in this post.
Quick Links:
- All About AMP
- The WordPress AMP Plugin
- AMP Template Customization for Themes
- Final Thoughts
All About AMP
![]()
AMP stands for “Accelerated Mobile Pages.” It is an open source project backed by Google that makes web pages load really, really fast. There are also some huge benefits for publishers who take advantage of AMP:
- AMP pages are cached and served by Google itself.
- Two versions of the page are now available to search queries: HTML and AMP.
- They receive Google’s “Mobile-friendly” or “AMP” label in search results, notifying users that the page will load quickly.
- Google may use AMP as a PageRank consideration in the future (“mobile-friendliness” already is).

Example of the Google “AMP” label. Don’t ask why I was googling Pokemon Go.
Further reading: Does Google AMP Affect SEO?
In order for Google to cache your pages and give it the AMP label, it must have valid AMP markup. AMP HTML is very similar to regular HTML5, with just a few exceptions.
AMP HTML
AMP HTML is quite simple. In most cases, it’s nearly identical to regular HTML5, with the exception that certain element tags are replaced with an AMP version. For instance, the <img> tag becomes <amp-img></amp-img>.
Further reading: The AMP Spec Document
AMP has very specific standards. These standards are in place so that it can render each page as quickly as possible. Here are some highlights of the requirements for valid AMP documents:
- The document <head> must contain specific scripts and styles.
- Only inline styles are allowed (No external stylesheets)
- The inline styles are limited to 50Kb in size
- Slow-loading elements — like <frame>, <object>, and — are prohibited.
- No custom JavaScript is allowed (but there are several AMP extensions that provide common JS functionality for you)
AMP Extensions (or, “Components”)
AMP Extensions are helpful components that expand what AMP does by default.
Below are a few noteworthy examples, but there are many other Extensions available.
amp-sidebar (or “menu”)
The AMP Sidebar extension is what is commonly used as a menu in WP. It allows for a button (or other element, like a hamburger icon) to trigger a menu that slides into the page from the side. I’ll discuss this in detail below.
This element can only be used once on a page, and it essentially only allows text, images, and accordions, so keep that in mind.
amp-ad
So your site depends upon ad revenue (who’s doesn’t?). Thankfully, AMP provides a format for including these in your markup with the AMP Ad extension.
amp-brightcove
Hey, who doesn’t love Brightcove content? To support the need for this feature, AMP has created the AMP Brightcove Extension. Note that even if you have a lot of custom parameters to pass into Brightcove, you can still do that.
amp-social-share
AMP Social Share is really quite handy, as it takes care of integrating a bunch of sharing into your template by passing just some basic attributes.
The WordPress AMP Plugin

The good news for you is that the team at Automattic has created a very nice plugin to handle creating valid AMP documents in WordPress. It’s simply called “AMP,” but for clarity’s sake, I’ll refer to it as “WP AMP” throughout this discussion.
To a user, the plugin simply makes an AMP version of a post is available. This post is found at the same URL as the post, but with “/amp” tacked on to the end.
So if the URL is yoursite.com/hello-world, the AMP version is found at yoursite.com/hello-world/amp/.
For developers, WP AMP is basically a templating system. It contains a basic AMP HTML template, and uses hooks and filters to ensure your content is rendered as valid AMP markup. For example, the provided template includes the required code for the <head>, and it filters the post content to ensure your <img> tags are replaced with <amp-img>.
Further reading: WP AMP plugin documentation

The default WP AMP post template.
AMP Template Customization for Themes
So, if you’re a theme developer, you’ll want to customize this document’s appearance to match the rest of your layout so that your users will have a seamless visual experience. The rest of this post discusses how to do just that.
Customizing the WP AMP plugin to work with your theme takes a bit of work, but it will definitely be a big bonus to your users. As this is a growing technology, there will be increasing demand for the fast page load times and Google recognition that AMP provides. At this point, it will set your work apart from other WordPress themes.
Basic AMP Support Setup
Note that this tutorial is written for WP AMP version 0.3.2.
1. Set Up Your AMP Directory
To get started, create a directory in your theme called “amp/”. Inside that directory, create “amp.php.” We’ll add all of our backend code inside this file.
Now take a step back, and require the amp/amp.php file near the top of your theme’s functions.php:
require( dirname( __FILE__ ) . '/amp/amp.php' );
2. Register Your Custom Templates
Here’s where the fun begins. We’ll be adding your own template files so that you can customize them to match your theme.
After this following step, your theme’s file structure should end up looking like this:
your-theme/
   amp/
      templates/
         single.php
         style.php
      amp.php
   functions.php
   index.php
   style.css
Start by creating a directory inside of “amp/” called “templates/”. Not surprisingly, this will hold your template files.
Next, create a file inside templates called “style.php” (note that it’s a PHP file, not CSS). If you like, you can just copy the default style.php from the WP amp plugin: wp-content/plugins/amp/templates/style.php.
Now, go into the WP AMP plugin and copy the default single.php file (wp-content/plugins/amp/templates/single.php). Place this in your theme’s “amp/” directory. It’s important that you copy this one instead of starting from scratch, as there’s important data in its <head>, plus it also contains some of the actions we’ll be hooking into later.
3. Register Your Custom Templates
Add the function below to include support for both your new “single.php” and “style.php”
This file contains bidirectional Unicode text that may be interpreted or compiled differently than what appears below. To review, open the file in an editor that reveals hidden Unicode characters.
Learn more about bidirectional Unicode characters
| <?php | |
| /** | |
| * Add a custom AMP template file. | |
| * | |
| * Registers templates in a /templates subdirectory. | |
| * | |
| * @filter amp_post_template_file | |
| * | |
| * @param string $file The file name input. | |
| * @param string $type The type of template. | |
| * @param object $post WP Post Object. | |
| * | |
| * @return string | |
| */ | |
| function jr3_amp_custom_templates( $file, $type, $post ) { | |
| if ( 'single' === $type ) { | |
| $file = dirname( __FILE__ ) . '/templates/single.php'; | |
| } elseif ( 'style' === $type ) { | |
| $file = dirname( __FILE__ ) . '/templates/style.php'; | |
| } | |
| return $file; | |
| } | |
| add_filter( 'amp_post_template_file', 'jr3_amp_custom_templates', 10, 3 ); |
Going Further
Support Custom Post Types
If you have Custom Post Types in your theme, you’ll need to tell WP AMP what they are so that those posts will have AMP versions available.
This file contains bidirectional Unicode text that may be interpreted or compiled differently than what appears below. To review, open the file in an editor that reveals hidden Unicode characters.
Learn more about bidirectional Unicode characters
| <?php | |
| /** | |
| * Register CPTs to be included with AMP integration. | |
| * | |
| * Be sure to visit Settings > Permalinks and save twice | |
| * to ensure the rewrite rules are flushed after adding this. | |
| * | |
| * @action amp_init | |
| */ | |
| function jr3_amp_register_post_types() { | |
| if ( ! defined( 'AMP_QUERY_VAR' ) ) { | |
| define( 'AMP_QUERY_VAR', apply_filters( 'amp_query_var', 'amp' ) ); | |
| } | |
| add_post_type_support( 'book', AMP_QUERY_VAR ); | |
| } | |
| add_action( 'amp_init', 'jr3_amp_register_post_types' ); |
Next, we’ll add our CPT templates.
Custom Post Type Templates
Adding special templates for your custom post types is optional, but the previous step is not. You’ll want a special CPT template if your CPT posts have a different layout or functionality than a typical post.
In your /templates directory, copy the single.php and rename it after the slug of your CPT. For instance, you may have a “book.php” now.
Then, we need to tell WP AMP to redirect to this template. Edit the function that I called jr3_amp_custom_templates() earlier. It will now look like this:
This file contains bidirectional Unicode text that may be interpreted or compiled differently than what appears below. To review, open the file in an editor that reveals hidden Unicode characters.
Learn more about bidirectional Unicode characters
| <?php | |
| /** | |
| * Add custom AMP template files. | |
| * | |
| * Registers templates in a /templates subdirectory. | |
| * | |
| * @filter amp_post_template_file | |
| * | |
| * @param string $file The file name input. | |
| * @param string $type The type of template. | |
| * @param object $post WP Post Object. | |
| * | |
| * @return string | |
| */ | |
| function jr3_amp_custom_templates( $file, $type, $post ) { | |
| if ( 'single' === $type && ( 'book' === $post->post_type ) ) { | |
| $file = dirname( __FILE__ ) . '/templates/book.php'; | |
| } elseif ( 'single' === $type ) { | |
| $file = dirname( __FILE__ ) . '/templates/single.php'; | |
| } elseif ( 'style' === $type ) { | |
| $file = dirname( __FILE__ ) . '/templates/style.php'; | |
| } | |
| return $file; | |
| } | |
| add_filter( 'amp_post_template_file', 'jr3_amp_custom_templates', 10, 3 ); |
Component Scripts
Each AMP Extension (once again, also called a “Component”) has a supporting JS resource.
If you’re using any other Extensions in your template files, like amp-ad, amp-social-share, or amp-sidebar, you must register the JS with WP AMP so it gets loaded correctly.
This file contains bidirectional Unicode text that may be interpreted or compiled differently than what appears below. To review, open the file in an editor that reveals hidden Unicode characters.
Learn more about bidirectional Unicode characters
| <?php | |
| /** | |
| * Register the amp-sidebar and amp-accordion component scripts with WP AMP. | |
| * | |
| * This goes in your amp.php | |
| */ | |
| function jr3_amp_component_scripts( $data ) { | |
| $data['amp_component_scripts']['amp-sidebar'] = 'https://cdn.ampproject.org/v0/amp-sidebar-0.1.js'; | |
| $data['amp_component_scripts']['amp-accordion'] = 'https://cdn.ampproject.org/v0/amp-accordion-0.1.js'; | |
| return $data; | |
| } | |
| add_filter( 'amp_post_template_data', 'jr3_amp_component_scripts' ); |
Customizing Your Template
Custom CSS
As AMP does not allow external stylesheets, all CSS must be found in the document’s <head>. WP AMP gives us a tool for hooking styles into the <head>, which we’ve already set up. As a reminder, it will use our our templates/style.php file.
The contents of that file are pretty easy to understand. Open up the default WP AMP style.php and you’ll see that it’s almost all just plain text, except for a few places where colors and a few other settings are pulled in to render the desired CSS styles.
Keep in mind that the total size of CSS on the page cannot exceed 50Kb.
Here is an example of how the PHP interacts with the CSS:
This file contains bidirectional Unicode text that may be interpreted or compiled differently than what appears below. To review, open the file in an editor that reveals hidden Unicode characters.
Learn more about bidirectional Unicode characters
| <?php | |
| /** | |
| * Slightly modified version of the default WP AMP stylesheet, style.php. | |
| * | |
| * This is pared down for clarity. | |
| * | |
| * @link https://github.com/Automattic/amp-wp/blob/master/templates/style.php | |
| */ | |
| ?> | |
| /* Merriweather fonts */ | |
| @font-face { | |
| font-family:'Merriweather'; | |
| src:url('https://s1.wp.com/i/fonts/merriweather/merriweather-regular-webfont.woff2') format('woff2'), | |
| url('https://s1.wp.com/i/fonts/merriweather/merriweather-regular-webfont.woff') format('woff'), | |
| url('https://s1.wp.com/i/fonts/merriweather/merriweather-regular-webfont.ttf') format('truetype'), | |
| url('https://s1.wp.com/i/fonts/merriweather/merriweather-regular-webfont.svg#merriweatherregular') format('svg'); | |
| font-weight:400; | |
| font-style:normal; | |
| } | |
| /* Generic WP styling */ | |
| amp-img.alignright { float: right; margin: 0 0 1em 1em; } | |
| amp-img.alignleft { float: left; margin: 0 1em 1em 0; } | |
| amp-img.aligncenter { display: block; margin-left: auto; margin-right: auto; } | |
| .alignright { float: right; } | |
| .alignleft { float: left; } | |
| .aligncenter { display: block; margin-left: auto; margin-right: auto; } | |
| .wp-caption.alignleft { margin-right: 1em; } | |
| .wp-caption.alignright { margin-left: 1em; } | |
| .amp-wp-enforced-sizes { | |
| /** Our sizes fallback is 100vw, and we have a padding on the container; the max-width here prevents the element from overflowing. **/ | |
| max-width: 100%; | |
| } | |
| .amp-wp-unknown-size img { | |
| /** Worst case scenario when we can't figure out dimensions for an image. **/ | |
| /** Force the image into a box of fixed dimensions and use object-fit to scale. **/ | |
| object-fit: contain; | |
| } | |
| /* Template Styles */ | |
| .amp-wp-content, .amp-wp-title-bar div { | |
| <?php $content_max_width = absint( $this->get( 'content_max_width' ) ); ?> | |
| <?php if ( $content_max_width > 0 ) : ?> | |
| max-width: <?php echo sprintf( '%dpx', $content_max_width ); ?>; | |
| margin: 0 auto; | |
| <?php endif; ?> | |
| } | |
| body { | |
| font-family: 'Merriweather', Serif; | |
| font-size: 16px; | |
| line-height: 1.8; | |
| background: #fff; | |
| color: #3d596d; | |
| padding-bottom: 100px; | |
| } | |
| /* Other Elements */ | |
| amp-carousel { | |
| background: #000; | |
| } | |
| amp-iframe, | |
| amp-youtube, | |
| amp-instagram, | |
| amp-vine { | |
| background: #f3f6f8; | |
| } | |
| amp-carousel > amp-img > img { | |
| object-fit: contain; | |
| } | |
| .amp-wp-iframe-placeholder { | |
| /** The below data is set via a hook in the plugin. **/ | |
| background: #f3f6f8 url( <?php echo esc_url( $this->get( 'placeholder_image_url' ) ); ?> ) no-repeat center 40%; | |
| background-size: 48px 48px; | |
| min-height: 48px; | |
| } |
Add A Nav Menu
A Navigation Menu is one feature that is glaringly lacking from the default WP AMP template. Naturally, its authors are unable to know if you have a nav menu in your theme, and even if they did, they don’t know what location label you’ll give it, so it’s understandable why they left it up to you to customize.
AMP has an Extension called “amp-sidebar.” This is a block of content that is triggered by a click that slides in from the side of the page. We’re going to use this for our menu.
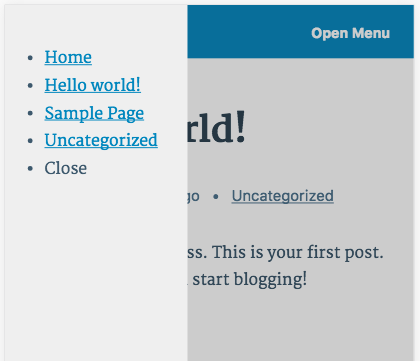
Example of a basic Navigation Menu using amp-sidebar.
First, following the example code below, add two functions to your amp.php:
jr3_amp_sidebar_component_scripts() tells WP AMP to load the amp-sidebar JS into the template’s <head>. (Check to make sure you didn’t already add this if you added the component scripts earlier)
jr3_clean_nav_menu_items() is a helper function I wrote to make a barebones list of menu items. It skips adding all of the unneeded wrappers and classes to the nav menu.
Below those functions are two blocks of HTML to add to your single.php (and other template files). The first is the HTML that holds our primary nav menu. The next is the actual button that will trigger the opening/closing of the amp-sidebar menu.
Add Featured Images
By default, featured images are not included in the WP AMP templates. Here’s how you do that, taken almost directly from the WP AMP docs.
This file contains bidirectional Unicode text that may be interpreted or compiled differently than what appears below. To review, open the file in an editor that reveals hidden Unicode characters.
Learn more about bidirectional Unicode characters
| <?php | |
| /** | |
| * Allow custom actions in our AMP template. | |
| */ | |
| function jr3_amp_add_custom_actions() { | |
| add_filter( 'the_content', 'jr3_amp_add_featured_image' ); | |
| } | |
| add_action( 'pre_amp_render_post', 'jr3_amp_add_custom_actions' ); | |
| /** | |
| * Add Featured Image Support. | |
| * | |
| * @link https://github.com/Automattic/amp-wp#featured-image | |
| */ | |
| function jr3_amp_add_featured_image( $content ) { | |
| if ( has_post_thumbnail() ) { | |
| // Just add the raw <img /> tag; the WP AMP sanitizer will take care of it later. | |
| $image = sprintf( '<p class="jr3-featured-image">%s</p>', get_the_post_thumbnail() ); | |
| $content = $image . $content; | |
| } | |
| return $content; | |
| } |
Social Share Buttons
Since social share buttons often require JS to function, AMP has added support for them via its amp-social-share Extension. The code below can go directly into your template file. Don’t forget to register the amp-social-share component script with WP AMP.
I’ve found that Facebook requires an App ID, so be sure to add yours into your code. Naturally, you’ll need to add some PHP support for this to draw the Fb App ID from wherever you have it in your theme’s settings.
Bonus: Handling Shortcodes
As AMP has very specific rules about what markup is allowed, we need to be careful to only allow valid HTML to our templates.
Shortcodes are a way that unintended output can be slipped in to our content and render the page invalid. One simple (but not preferable) way to prevent this is to remove shortcodes from the content altogether.
This file contains bidirectional Unicode text that may be interpreted or compiled differently than what appears below. To review, open the file in an editor that reveals hidden Unicode characters.
Learn more about bidirectional Unicode characters
| <?php | |
| /** | |
| * Strip out all shortcode content. | |
| * | |
| * This is a quick and dirty way | |
| * to ensure no shortcodes introduce | |
| * invalid markup into an amp template. | |
| * | |
| * @param string $content WP Post content. | |
| * | |
| * @return string | |
| */ | |
| function jr3_amp_strip_all_shortcodes( $content ) { | |
| global $shortcode_tags; | |
| if ( ! amp_is_request() || empty( $shortcode_tags ) || ! is_array( $shortcode_tags ) ) { | |
| return $content; | |
| } | |
| $regex = get_shortcode_regex(); | |
| $content = preg_replace( "/$regex/", '', $content ); | |
| return $content; | |
| } | |
| add_filter( 'the_content', 'jr3_amp_strip_all_shortcodes' ); |
Unfortunately, this approach is pretty brutish. You should really use another solution for this issue, as you may want to allow certain shortcodes, or even filter the content to replace the shortcode with custom formatting.
Here’s an example of how I modified a hypothetical shortcode called “podcast” to accommodate <amp-audio>. You’ll note that I also include a helper function to grab the shortcode attributes that we need so we can add that data to our <amp-audio> tag.
This file contains bidirectional Unicode text that may be interpreted or compiled differently than what appears below. To review, open the file in an editor that reveals hidden Unicode characters.
Learn more about bidirectional Unicode characters
| <?php | |
| /** | |
| * Hijack a hypothetical [podcast] custom shortcode for AMP. | |
| * | |
| * Replaces [podcast] output with amp-audio. | |
| * | |
| * Be sure you've added the amp-audio component script to the template. | |
| * | |
| * @filter the_content | |
| * | |
| * @param string $content The Post content. | |
| * | |
| * @return string | |
| */ | |
| function jr3_filter_shortcode_podcast( $content ) { | |
| global $shortcode_tags; | |
| if ( ! is_amp_endpoint() || empty( $shortcode_tags ) || ! is_array( $shortcode_tags ) ) { | |
| return $content; | |
| } | |
| $regex = get_shortcode_regex( array( 'podcast' ) ); | |
| if ( ! $url = jr3_get_shortcode_attr( $content, $regex, 'mp3' ) ) { | |
| // Strip out the shortcode to prevent errant output. | |
| return preg_replace( "/$regex/", '', $content ); | |
| } | |
| // AMP's amp-audio only supports https:// and //, so ensure we're not using http://. | |
| $url = str_replace( 'http:', '', $url ); | |
| $url = trim( $url ); | |
| ob_start(); | |
| ?> | |
| <amp-audio width="auto" | |
| height="50" | |
| src="<?php echo esc_url( $url ); ?>"> | |
| <div fallback> | |
| <p><?php esc_html_e( 'Your browser doesn\'t support HTML5 audio', 'wp-amp-tutorial' ); ?></p> | |
| </div> | |
| </amp-audio> | |
| <?php | |
| $amp_audio = ob_get_clean(); | |
| $content = preg_replace( "/$regex/", $amp_audio, $content ); | |
| return $content; | |
| } | |
| add_filter( 'the_content', 'jr3_filter_shortcode_podcast' ); | |
| /** | |
| * Get a value from a shortcode. | |
| * | |
| * Helper function for xwp_filter_shortcode_audio(). | |
| * | |
| * Example: | |
| * | |
| * Search for the audio shortcode looks like this in the Post content: | |
| * [podcast url="http://example.com/audio.mp3"%5D | |
| * and you want to get the value of "url"… | |
| * | |
| * Do this: | |
| * $regex = get_shortcode_regex( 'podcast' ); | |
| * $url_value = xwp_get_shortcode_attr( $content, $regex, 'url' ); | |
| * | |
| * The $url_value will now be "http://example.com/audio.mp3". | |
| * | |
| * @param string $content Post content. | |
| * @param string $regex Regex to compare. | |
| * @param string $search The Shortcode param to find. | |
| * | |
| * @return mixed Param content, else false. | |
| */ | |
| function jr3_get_shortcode_attr( $content, $regex, $search ) { | |
| // Find the shortcode. | |
| preg_match( "/$regex/", $content, $shortcode_atts ); | |
| $search = $search . '='; | |
| if ( empty( $shortcode_atts ) ) { | |
| return false; | |
| } | |
| // Find item in atts array that starts with $search. | |
| $matches = array_filter( $shortcode_atts, function( $var ) use ( $search ) { | |
| return ( 0 === strpos( trim( $var ), $search ) ); | |
| } | |
| ); | |
| if ( empty( $matches ) ) { | |
| return false; | |
| } | |
| // Get the first occurrence of our string. | |
| $value_string = array_shift( array_values( $matches ) ); | |
| $val = str_replace( $search , '', $value_string ); | |
| // Strip out both double and possible single quotes. | |
| $val = str_replace( '"', '', $val ); | |
| $val = str_replace( "'", '', $val ); | |
| return trim( $val ); | |
| } |
Final Thoughts
AMP is going to be a big deal, and soon. In my experience, clients are already asking us at XWP to integrate it into their WP sites.
If you want to stay ahead of the competition in the WP theme world, or offer your clients another valuable service, you definitely need to integrate this into your themes.
I hope that my experience in this speciality will help you on your way.
Happy coding!
Resources
- AMP Project Website
- AMP By Example
- AMP HTML Spec
- AMP Project GitHub Account
- “Intro to AMP” Video
- “How AMP achieves its speed” Video
- Automattic AMP Plugin
- Automattic AMP Plugin GitHub Repo
- Does Google AMP Affect SEO?
